Lighting Overview
'The study of light will improve your photography faster than the study of photography will improve your photography. You see, working with light is what makes you a photographer–ANYONE can learn to use a camera' - www.improvephotography.com
|
Light is more than just how bright or dark it is; it’s also the key to the look, mood and atmosphere of your images. The direction of the light will affect how the shape and texture of your subject appears, while the colour and how soft or harsh the light is can totally change a shot’s appearance.
There are three basic characteristics of light that determine how your shot will look: how harsh or soft it is, the direction and the colour. It’s easiest to tell the quality of the light by looking at the shadows, rather than the areas in the light. Harsh, direct light creates strong, well-defined shadows, while the shadows created by more diffuse lighting are much softer. The location of the shadows tells you where the light is coming from, as they appear on the opposite side to the light. Review the PPT opposite on the various types of light. You will spend the next few lessons capturing images outlined in the assignment using some of the activities below. |
Build a Studio
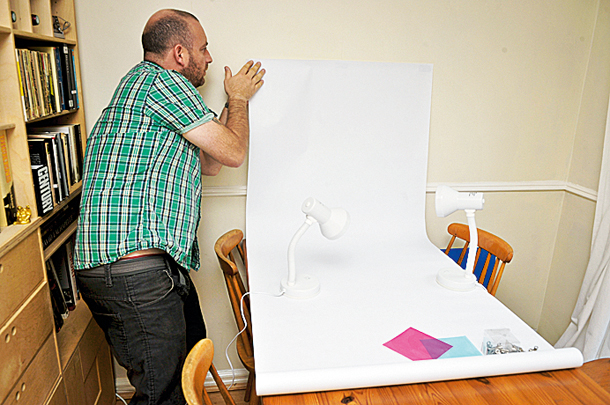
Building your own studio doesn't have to be an expensive operation and can simply be done using some cheap table lamps. Follow this basic step by step guide to making your own studio.
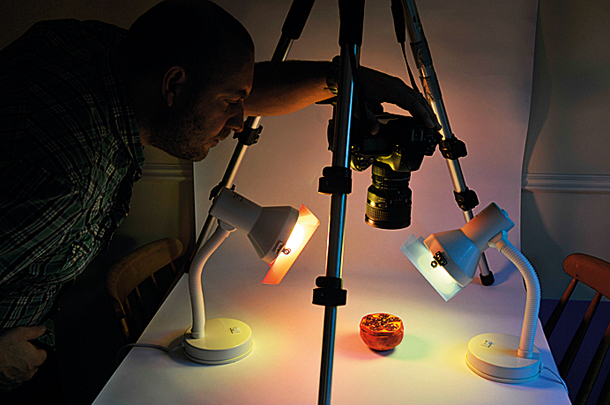
- Use two lamps, preferably with energy-saving bulbs of varying power, such as a 12W and a 20W. These are ideal for creating a mini pro studio setup, with the most powerful light acting as a key light and the other as a fill.
- Cut some coloured gels from some cheap A5 document wallets. Simply cut a square slightly larger than the lamp diameter from the largest side of the wallet.
- Fix the gels onto the lamps slightly proud of the hot bulb to avoid melting. Clamp two small bulldog clips to each side of the lamp rim and slot the coloured gel between the clip handles.
- To obtain a neutral background, get some poster paper, or even old wallpaper, and roll it out on a tabletop. Fix one end to a wall and drape the other end across the tabletop.
- Experiment by placing the lamps at varying distances from your subject. Of course, you don’t have to use the coloured gels, but they’re great for injecting background colour as well as subtle tints.

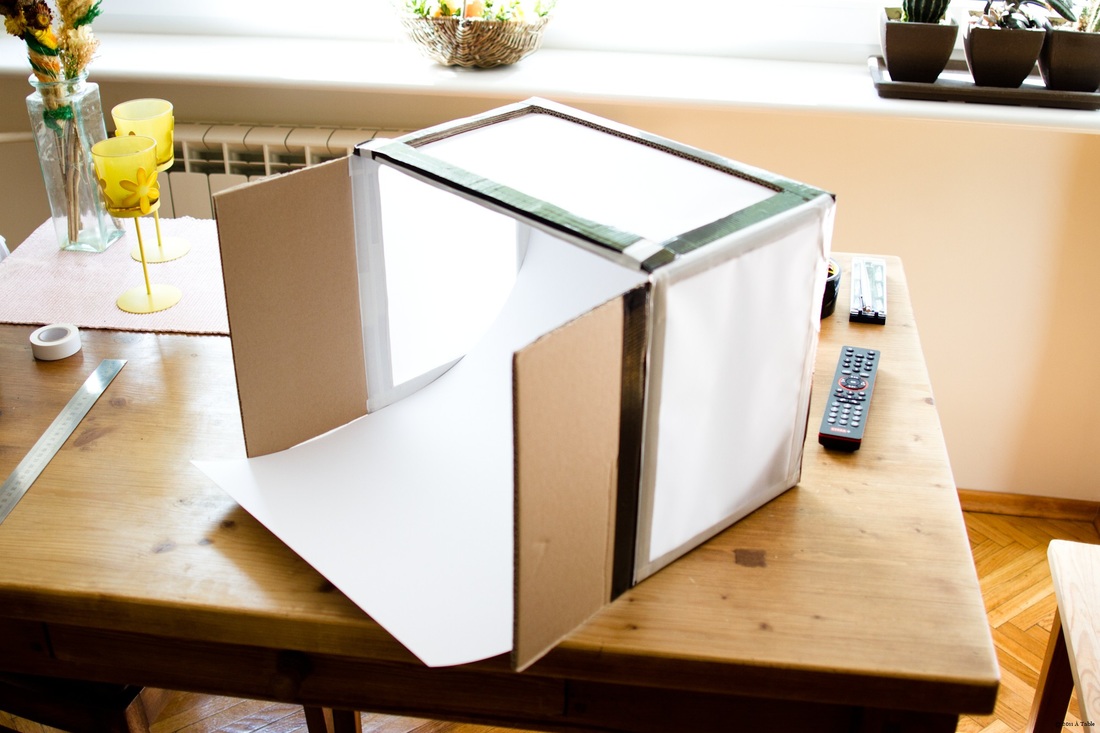
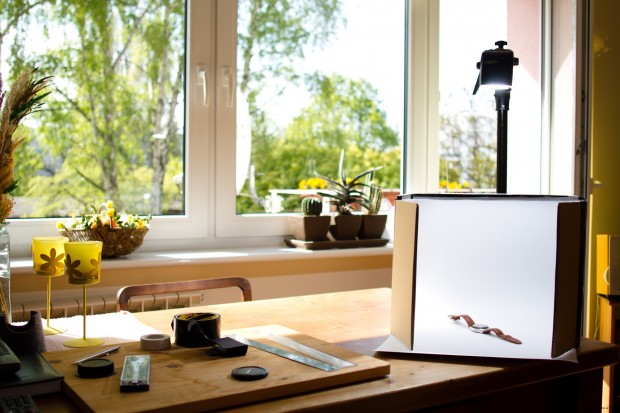
Another option that you could do is build a DIY studio box, this is idea for doing any sort of marco photograph. To build this you will need a solid cardboard box, tissue paper, some white card and some strong tape. You will also need a standing knife and cutting board to cut the holes in the box.
- Start by taping and fastening the base of your box with the strong tape before cutting any windows in the box. Remove the two flaps at the top of the box. Now cut the windows in three sides of the box. You may need to use of of the card you have cut out to add more stability to the sides of the box to ensure that it is more solid.
- Tape the tracing papers over the windows with the double sided tape. Also tape some white card over the two flaps on the original top of the box, these can act as reflectors when you will take pictures.
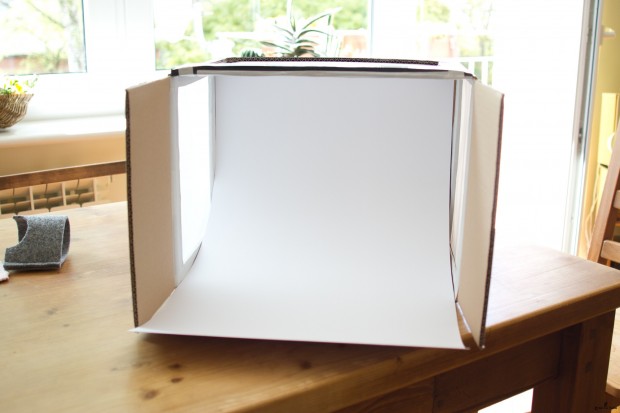
- Now you need to place the bottom-to-background element Cut the white card so that you can tape it using double sided tape, to the back of the box only on top. The white card will need to be at a very smooth angle in order to obtain the desired effect.
- Now you are ready to go! Place your subject matter in the box and add light to various sides of the box and see what effects you get.
Backlighting
|
One of the leading rules in elementary photography is to avoid shooting against the sun. Usually you will end up with either completely over exposed photographs, or a dark and indefinite shadow.
There are are several ingredients to consider when undertaking these shots, and it is essential to choose where in your frame you want to place the sun – only thereafter it is possible to get the exposure right. Basically,there are three options: The sun behind the model, outside the frame or in the actual shot. The last option is the most difficult, since it gets considerably harder to compose the shot. However, if you can control the natural backlighting, it will give you excellent and very creative images. It is a good idea though to keep the majority of the sun blocked and avoid too much light. It is advantageous to have your lens in the shade. A lens hood is useful while shooting with backlighting. CAMERA SETTINGS First, aperture. Look at capturing your image with a wide aperture in order to achieve the characteristic lens flare. Likewise, it gives a shallow depth of field. If you camera opens to width of f/2.8 then great, otherwise you should aim for it to be no less than f/5.6. Make sure also that you shoot using the manual settings. The picture has to be significantly overexposed, otherwise the model will turn out completely dark and the background/sky correctly lit. 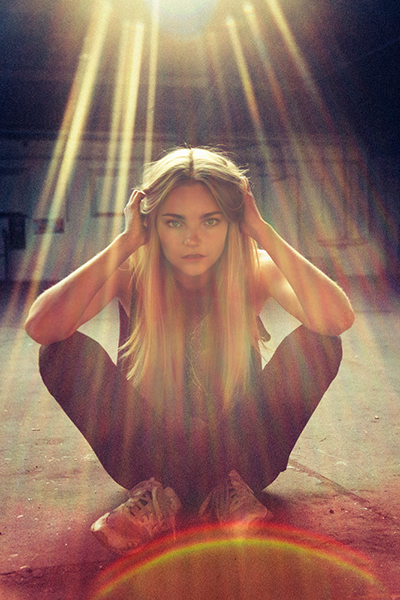
|
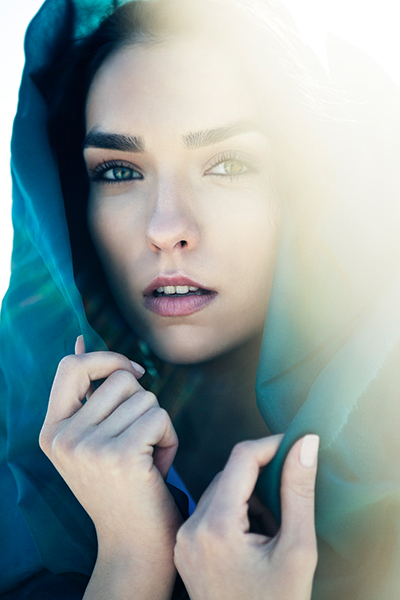
When it comes to shutter speed experiment with a variety of speeds between 1/100 to 1/640 seconds and see what results you come up with.
One of the hardest parts of shooting the perfect backlit portrait is control the focus. Cameras are definitely not very fond of shooting against the sun and autofocus will often not work. At this point it's best to either ask your model to block the sun and get your autofocus right in order to shift to manual, or simply try to adjust the focus and keep a fixed distance to the model. Finally keep your ISO as low as possible. There will be plenty of light to work with. All the shown photographs are shot with ISO 100. |
Backlighting to Silhouette
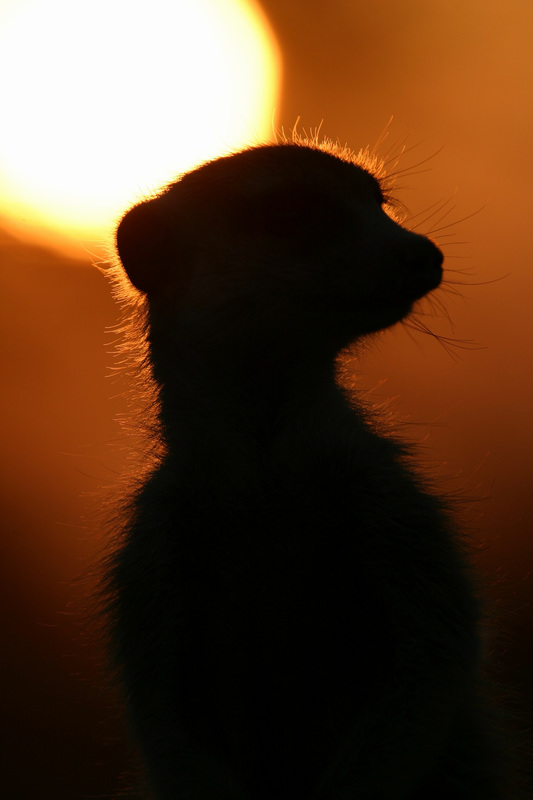
Silhouettes are a wonderful way to convey drama, mystery, emotion and mood to the viewers of your photos and often stand out in an album because of the combination of their simplicity, but also the story that they convey. The basic strategy you’ll need to employ in taking silhouette shots is to place your subject (the shape you want to be blacked out) in front of some source of light and to force your camera to set its exposure based upon the brightest part of your picture (the background) and not the subject of your image.
|
|
|
CAMERA SETTINGS & PHOTO SETUP
- Ensure that your flash is turned off as you want the subject to come out under exposed and dark.
- Get the light right - Instead of lighting the front of your subject, in silhouettes you need to ensure that there is more light shining from the back of your subject rather than the front. The perfect light for this is placing your subject in front of a sunset or sunrise, but really any bright light will be able to do the trick.
- Frame your shot so you are shooting with your subject in front of a nice plain, but bright background.
- If you are using the props, do not place these out of the line of sight of the light source, otherwise that will just blend in to your body and will disappear. When framing you’ll probably want to photograph silhouetted people as profiles rather than looking straight on. This means that more of their features (nose, mouth, eyes) are outlined and they are more likely to be recognised.
- If you shoot in an Auto mode most modern digital cameras have an automatic metering system , which senses how to expose a photograph so that everything is well lit. The problem with this is that most cameras are so smart that they will light up your subject instead of underexposing it to get a silhouette so you need to trick it. Most cameras work out the exposure levels in auto mode when you push your shutter half way down (at the same time that they focus). So point your camera at the brightest part of your picture and then press the shutter halfway down (don’t let go). Then move your camera back to frame your shot with the subject where you want it and then finish taking the shot.
- A simple way to start using manual mode is to look at the shutter speed and aperture that it suggests in automatic mode and to start from there. If in auto mode your subject is too light (i.e. you need to make it darker) stop down the shutter speed a stop or two and see what impact that has.
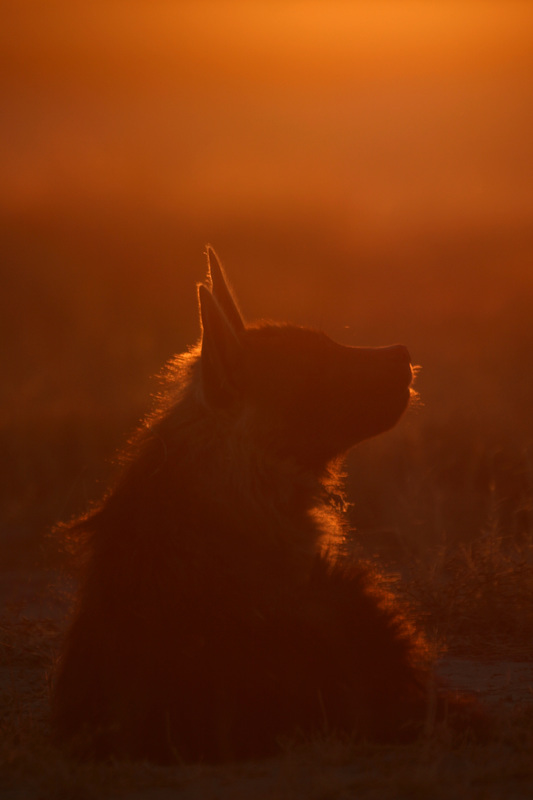
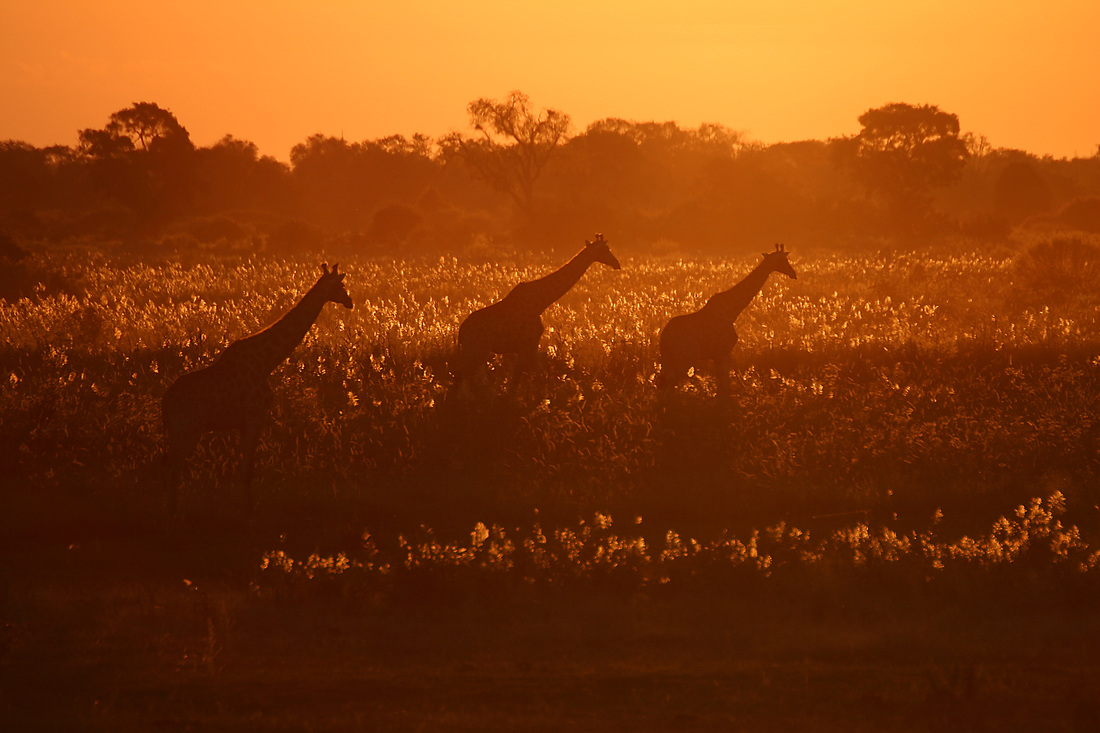
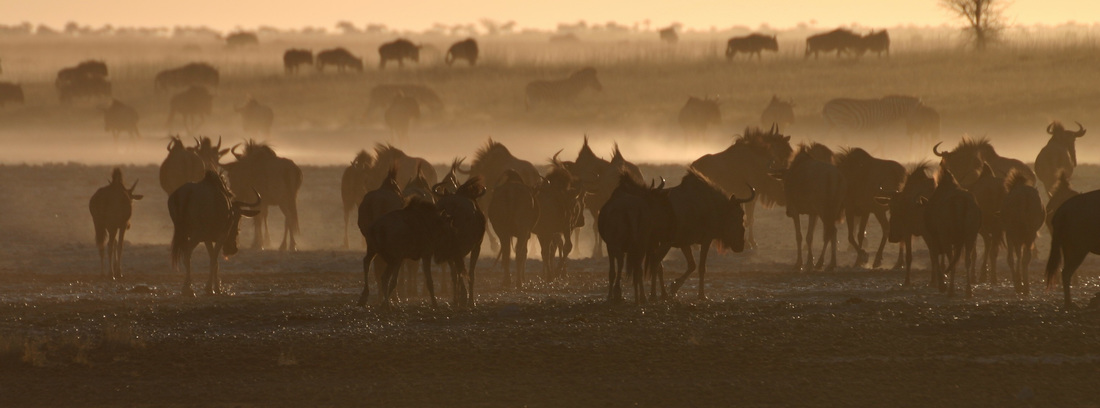
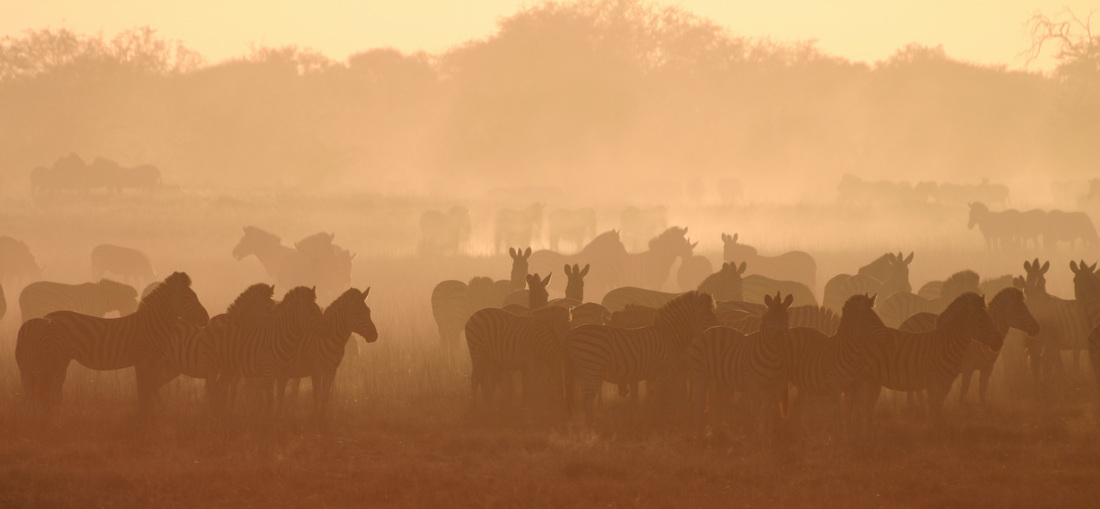
Backlighting and Silhouettes of Africa
A few from my time as a safari guide in Africa.

Bokeh
Bokeh is an adaptation from a a Japanese word meaning blur. In photography this term is used to describe the quality of the areas in the picture which are not in focus.
- Cut and shape the sheet to make a fake lens hood. The Diameter is made so that it snugly fits on the lens.
- In the middle of the filter the wanted bokeh shape is cut out, for example a heart is used. Do not create it too large or otherwise you will not create the desired effect, a diameter of 15-20mm is
- Set your camera to its lowest aperture value (completely open).
|
|
|
Using Flash
|
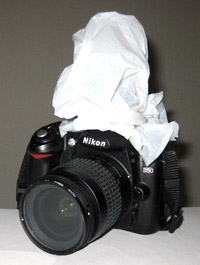
Flash photography is a wonderful thing as it allows you to take pictures in all manner of places where the natural lighting levels are poor. Most entry-level or a semi-professional DSLR and even point and shoot cameras come with a built-in flash unit that can be used to add some additional light on your subjects. The problem with built-in flashes, however, is that they fire harsh, direct light that often casts harsh shadows on wall behind the subject (opposite) and can leave subjects over exposed that are harshly and unnaturally lit.
There are many techniques for overcoming these problems including using bounce flash techniques and controlling the flash output from your camera, however one simple tip is to soften the light from your flash using a diffuser. Diffusers help eliminate harsh light and shadows and can help leave your photos looking more natural. However, rather than purchase an diffuser try some of the below quick and cheap hacks. |

|
Flash Hacks
|
The Shopping Bag - Whether you have an on or off-camera flash, tying a grocery bag over the light makes a great “lightbox” and helps spread the light across your subjects face and cuts down on shadows. Cut up section of the plastic bag if needed and use a rubber band wrap it around your flash. You can try this with different coloured plastic bags to see what effect that you get.
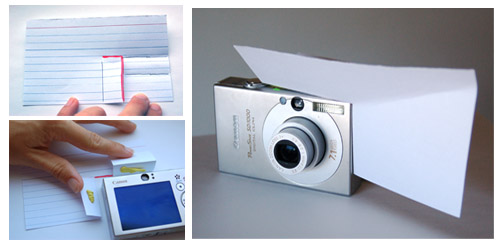
Point & Shoot Flash Hack - Bend the card over and around the on-camera flash, and affix it with a bit of sticky tack. This helps give a “glowing” look to photos. You can see from the image below how you line the camera up to the corner of the card, cut where the red lines are and then bend where the black lines are to create this “bounce” card. Attach the card to the camera with sticky tape or blu tac, then slightly bent the card to “frame” the camera’s flash better.
|
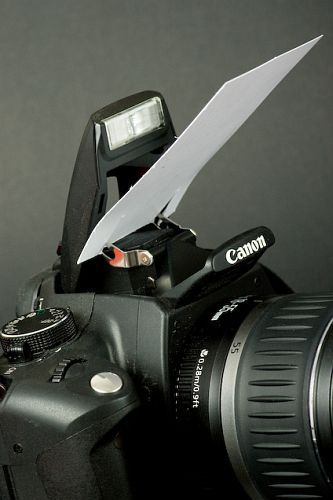
The Business Card - External flashes have the luxury of being able to tilt so that you can easily bounce the light off a wall or ceiling removing some of those harsh shadows around your subject. A cheap and easy trick is to try and bounce the light from your internal flash using a business card. Cardboard is great material for this Party Bouncer as most of the light bounces from the card into the ceiling, creating nice overall illumination, while some of the light penetrates directly through the card, disperses and lights the subject from the front. All you need a white piece of card and a pair of scissors. Make two cuts on the other end of the card and install it to the metallic hinges of the integrated flash. You might even consider an angle near 45 degrees..
|
Fill Flash
|
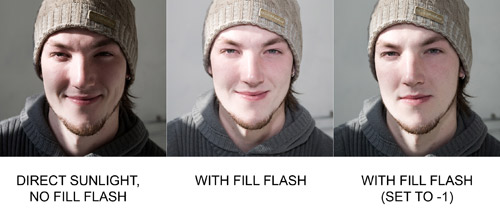
Where you find a pop-up flash to be somewhat helpful, is using it as fill flash outdoors. In situations when you shoot against bright backgrounds, you can end up with a properly exposed background, but an underexposed subject. In those cases, using your pop-up flash might yield some good results, since the flash will help lit your subject’s face and the background will also be properly exposed (as long as your subject is relatively close, within 3-10 feet).
|
|
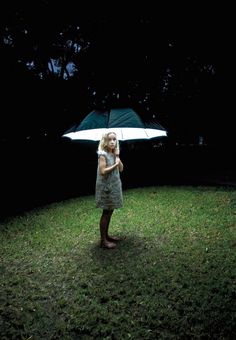
Umbrella Light: Photo ChallengeThere are so many fun a creative images that can be captured using a simple object such as an umbrella (opposite) and light. Light can really accomplish many things, including a perfect photograph. This photograph of a young girl standing outdoors at night underneath a brightly lit umbrella embraces what it would be like if an umbrella acted as a street light. But how have they created this as see if you can recreate this image. You have an umbrella, some tin foil, a light source and a dark room. Now off you go!
|
|
